
How To Edit Your Wildlife Photos Like A Pro
Editing photos has been made easy by the emergence of Photoshop and Lightroom. They have various tools that you can choose from, but these can be confusing for a beginner. Therefore, this article will guide you on how to edit your wildlife photos using the Lightroom Processing application.
1. Basic Tab- White Balance
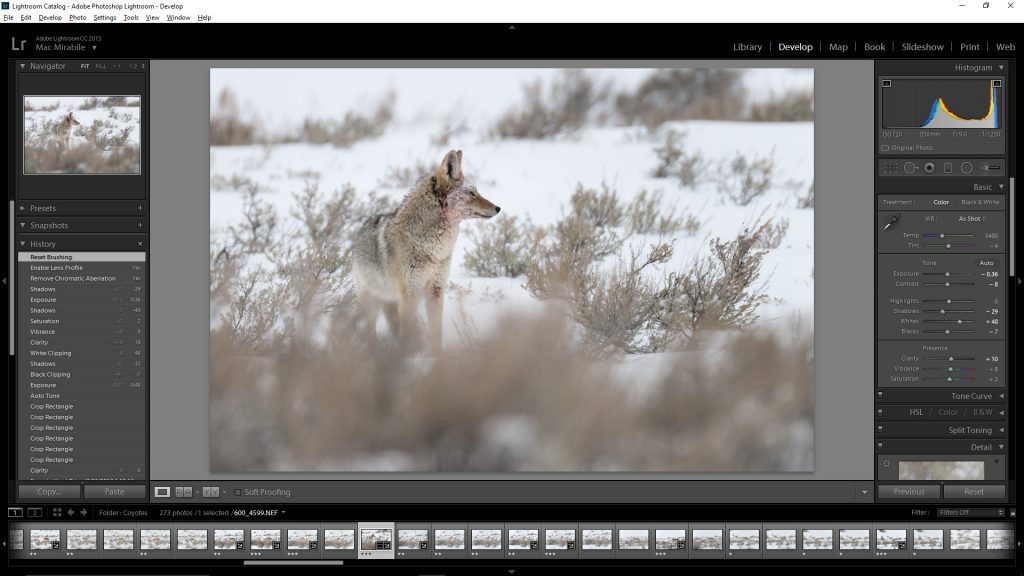
Fix the white balance in your photoshoot by using a neutral section of the picture as a rock. The ‘Temp’ slider must be moved in a bid to make it look natural because a rock can’t be orange or blue. You must gently move the ‘Tint’ slider with a maximum of +/- 10.
2. Basic Tab- Exposure
This enables you to adjust the exposure of the image or showcase the highlights and shadows. Caution must be exercised when brightening the shadows because grain and noise may spoil your photo if you adjust too much. The shadows can be reduced to a maximum of -15 to achieve the addition of contrast.
3. Basic Tab- Vibrance & Saturation
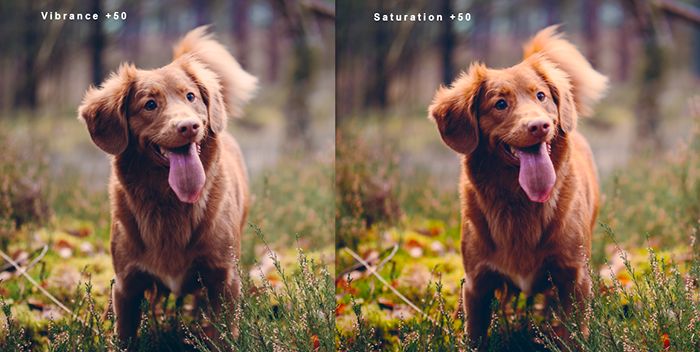
To bring back the original color of an image, use vibrance, which increases the concentration of colors in dull areas. If you want to increase color over the entire image, Saturation will do a perfect job on that.
4. HSL/Color
It enables you to alter the Hue and Saturation of the image color. This may be necessitated by the artificial look of certain colors in an image. For instance, filters may turn foliage neon green. Also, when you want a particular color to outshine other colors, Hue and Saturation can be used.
5. Detail Tab
When sharpening an image, use the detail tab. If you want to add grain to the image, use the tool ‘Amount.’ However, caution must be exercised to avoid too much adding of grain. The edge thickness of the image can be adjusted using ‘Radius.’ Therefore, to put a delightful finish to the image, ‘Texture’ found in the Basic tab helps to sharpen the image nicely.